Sales Order Sales
The Sales Order is your commitment to the customer — what they ordered, against their PO, at the agreed selling price and margin, for a given port call. It's the hub of the whole job: it drives the buying side (supplier purchase orders) and the delivery side (picking → packing → delivery → invoice), and it freezes the customer's bill-to and ship-to address onto the document.
Where to find it: the Sales Order screen in the menu.
What it is
A Sales Order confirms a deal. It records the customer, their PO number, the items and prices, and the port call the goods are for. From here you set the buying and the delivery in motion, and the invoice later bills against what was actually delivered. Once saved, it keeps its own frozen copy of the customer's addresses so printouts always show what was agreed at the time.
The list
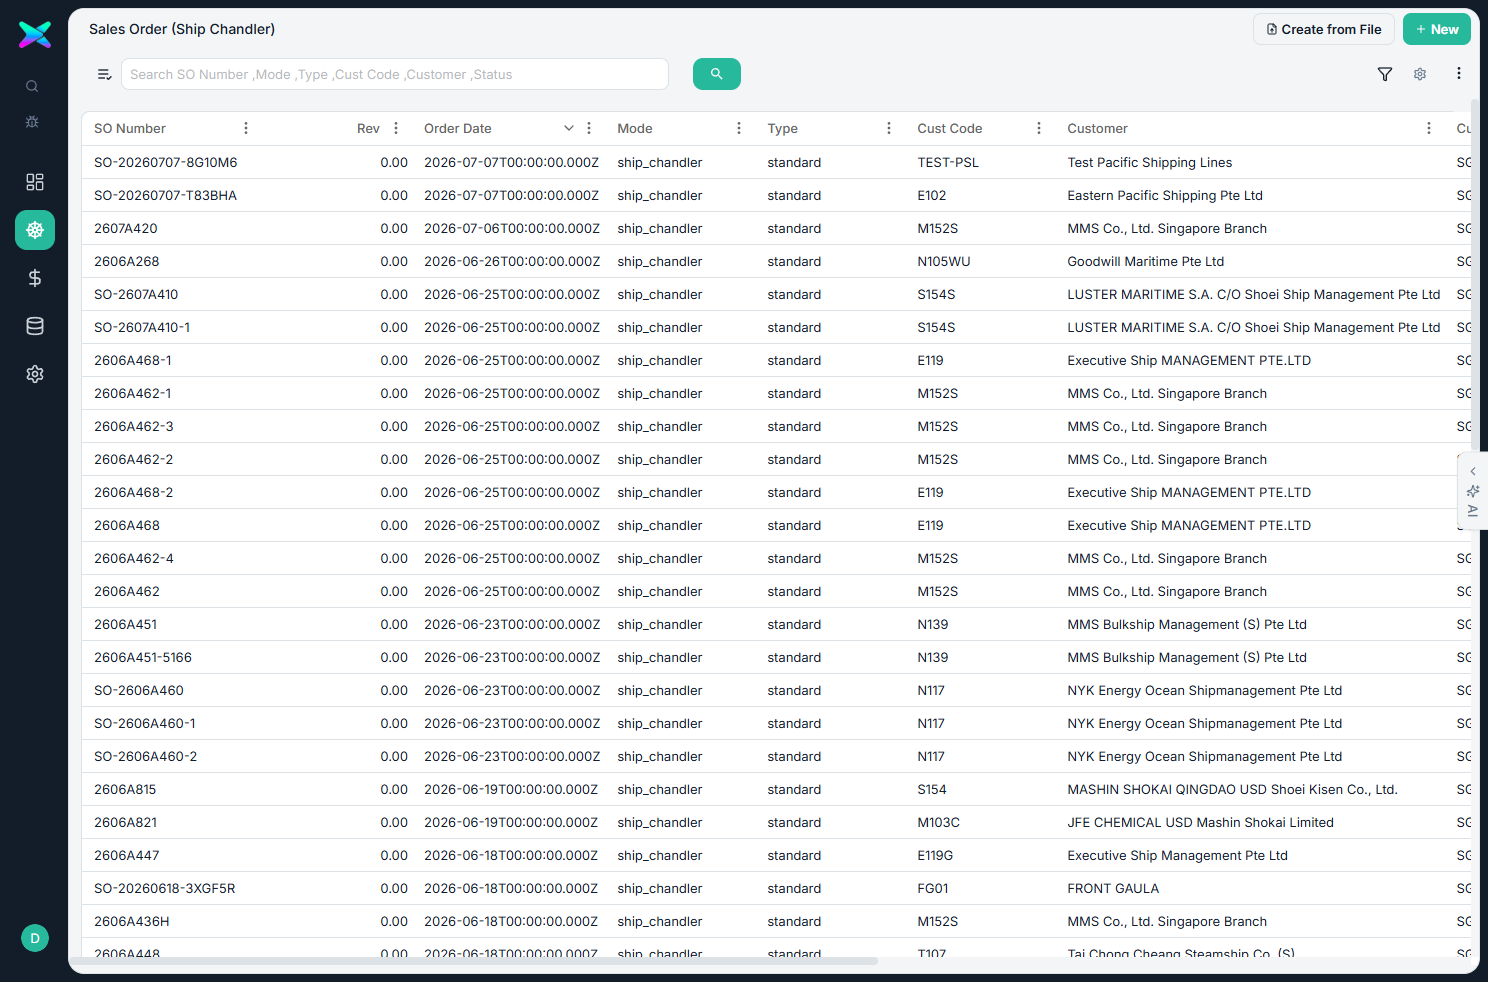
The list shows every order, newest first, with its number, date, customer, currency, grand total and status. Two ways to create one sit on the toolbar: Create from File (upload a document and let it read the lines) and New (a blank form).
The form
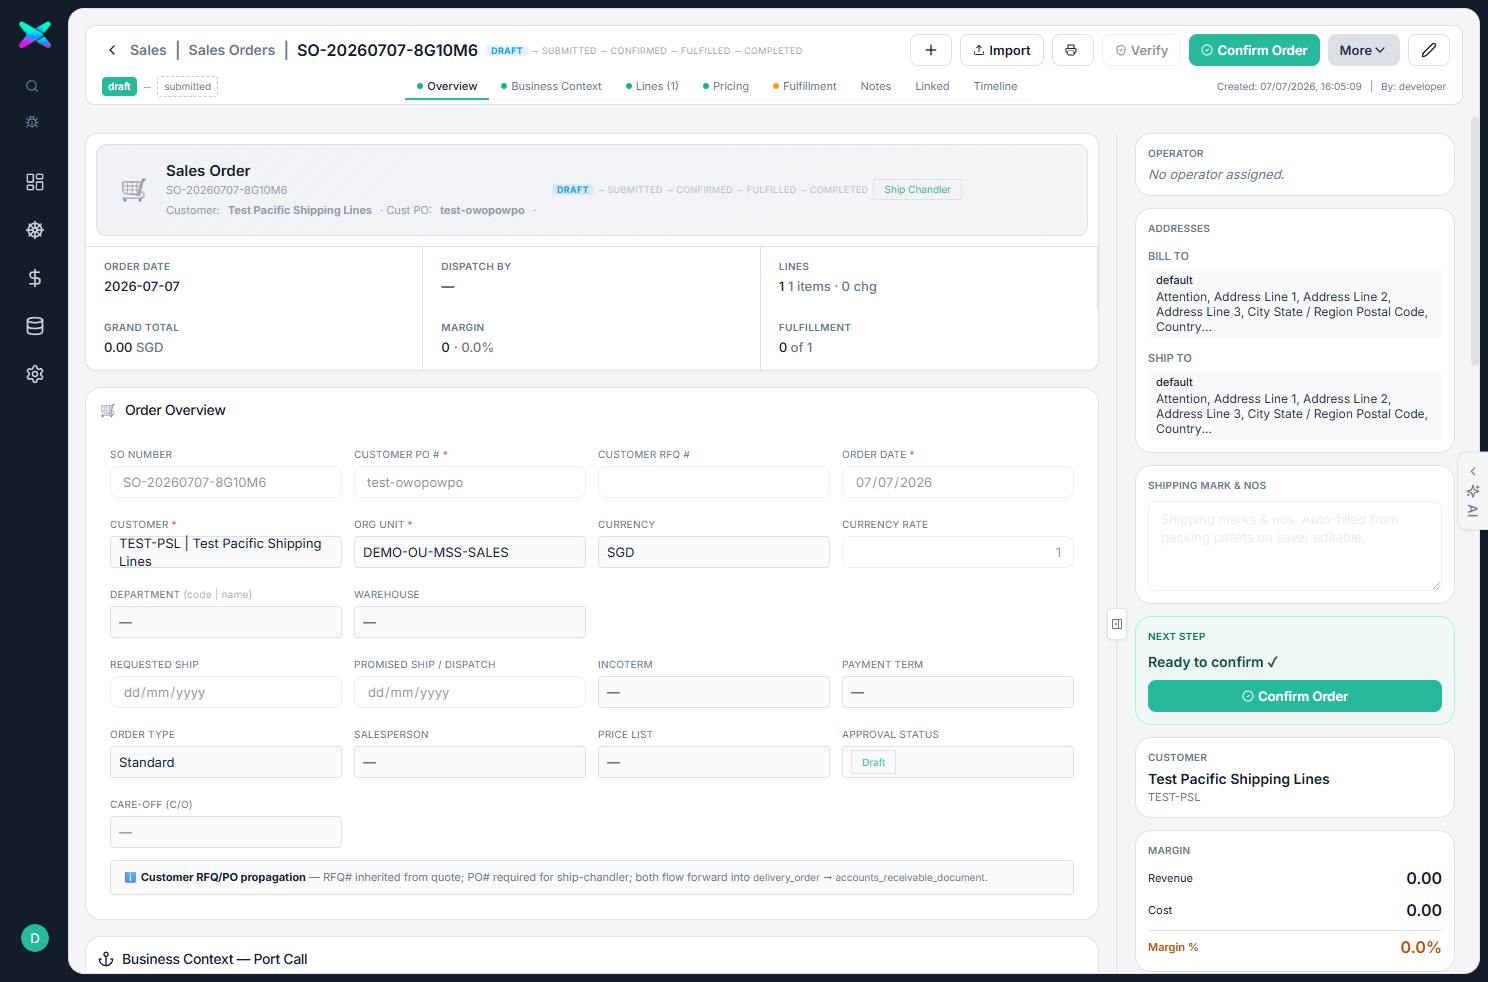
The form is organised into tabbed sections:
| Section | What you fill in |
|---|---|
| Header | The order number (editable), the status and its pipeline, and a badge showing the linked port call. |
| Customer & commercial | Customer, currency, exchange rate, the customer's PO number (required), their RFQ number, the order / requested / promised dates, the operator, the org unit, and the Care-Off toggle. |
| Business context — Port Call | The vessel, IMO, port, arrival and departure dates, agent and voyage — filled from the port call. |
| Lines | Each item, its ordered quantity, cost, markup %, unit price and unit; description and remark; the customer's own wording; the supplier for that line. Line badges show care-off, substitute, verify-pending, the assigned department and a PI tag when the line is set to appear on the Proforma Invoice, plus counters for how much has been reserved, picked, packed and delivered. |
| Pricing | Revenue, cost, margin % and any low-margin flags. |
| Bill / Ship address | The bill-to and ship-to addresses, with a "ship same as bill" toggle; defaults load from the customer and are frozen onto the order. |
| Shipping Mark & Nos | Free text (also refreshed from the packing pallets, and printed on the Profoma Invoice). |
| Notes · Attachments · Timeline | The usual notes, files and change history. |
Working with lines in bulk
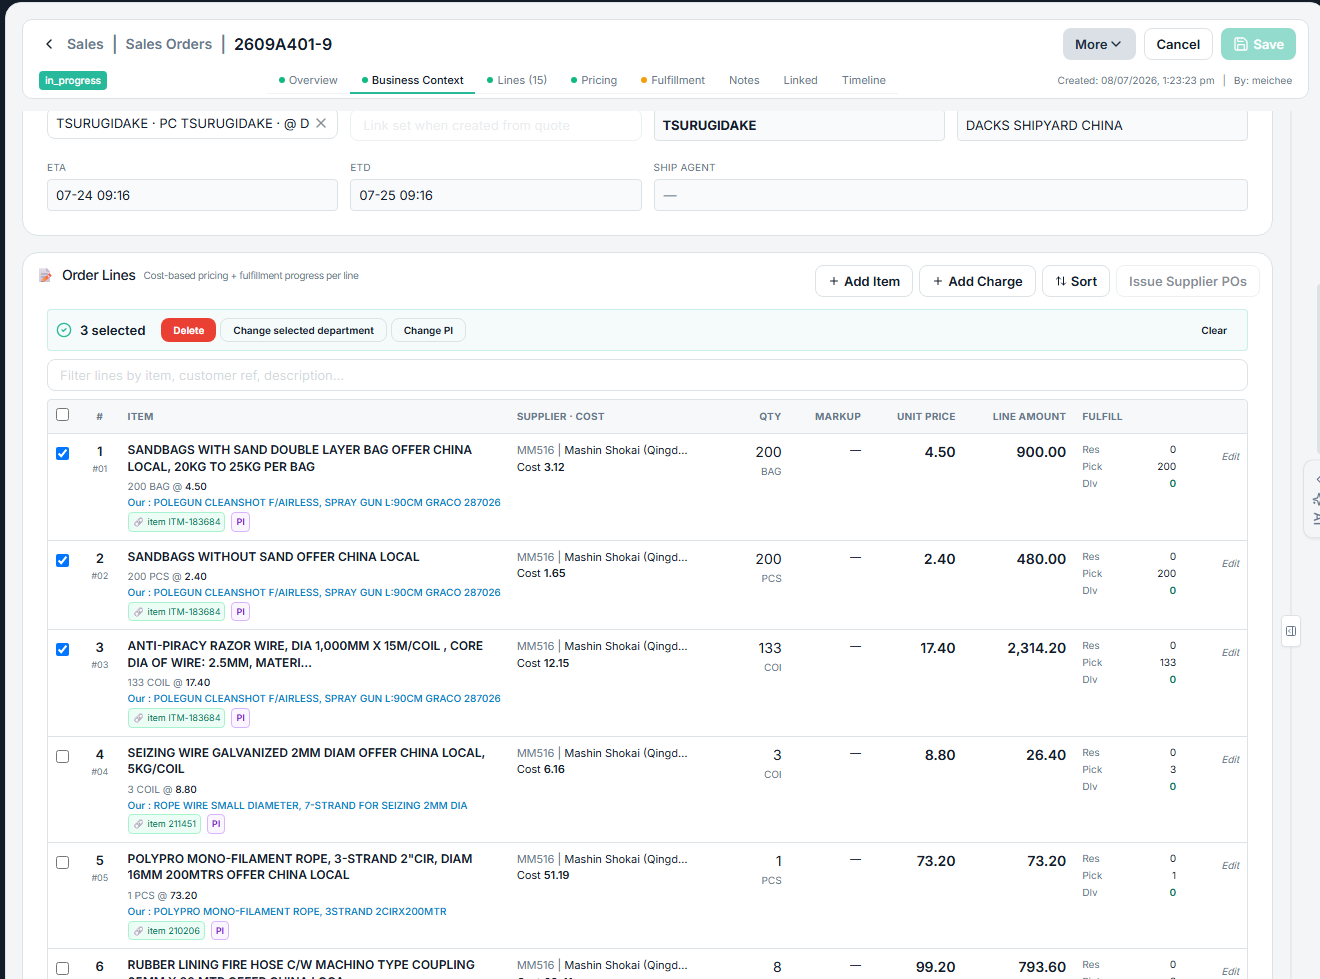
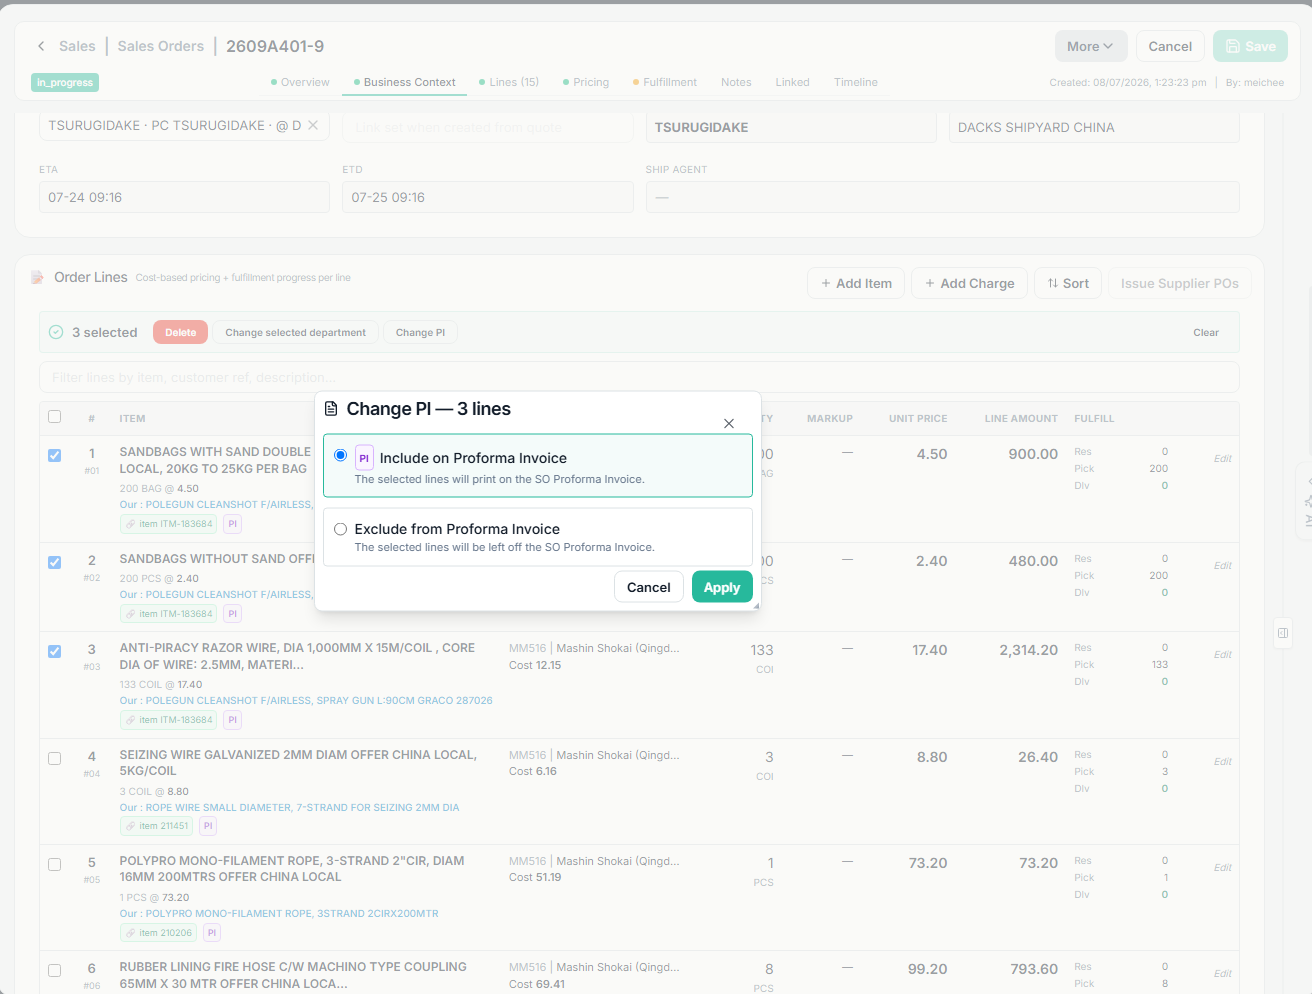
Tick the checkbox on one or more lines (or the header box to select them all) and a blue action bar appears above the list. Alongside Delete, it carries two bulk editors — Change selected department and Change PI — that apply your choice to every ticked line at once. Clear on the right drops the selection.
Change selected department
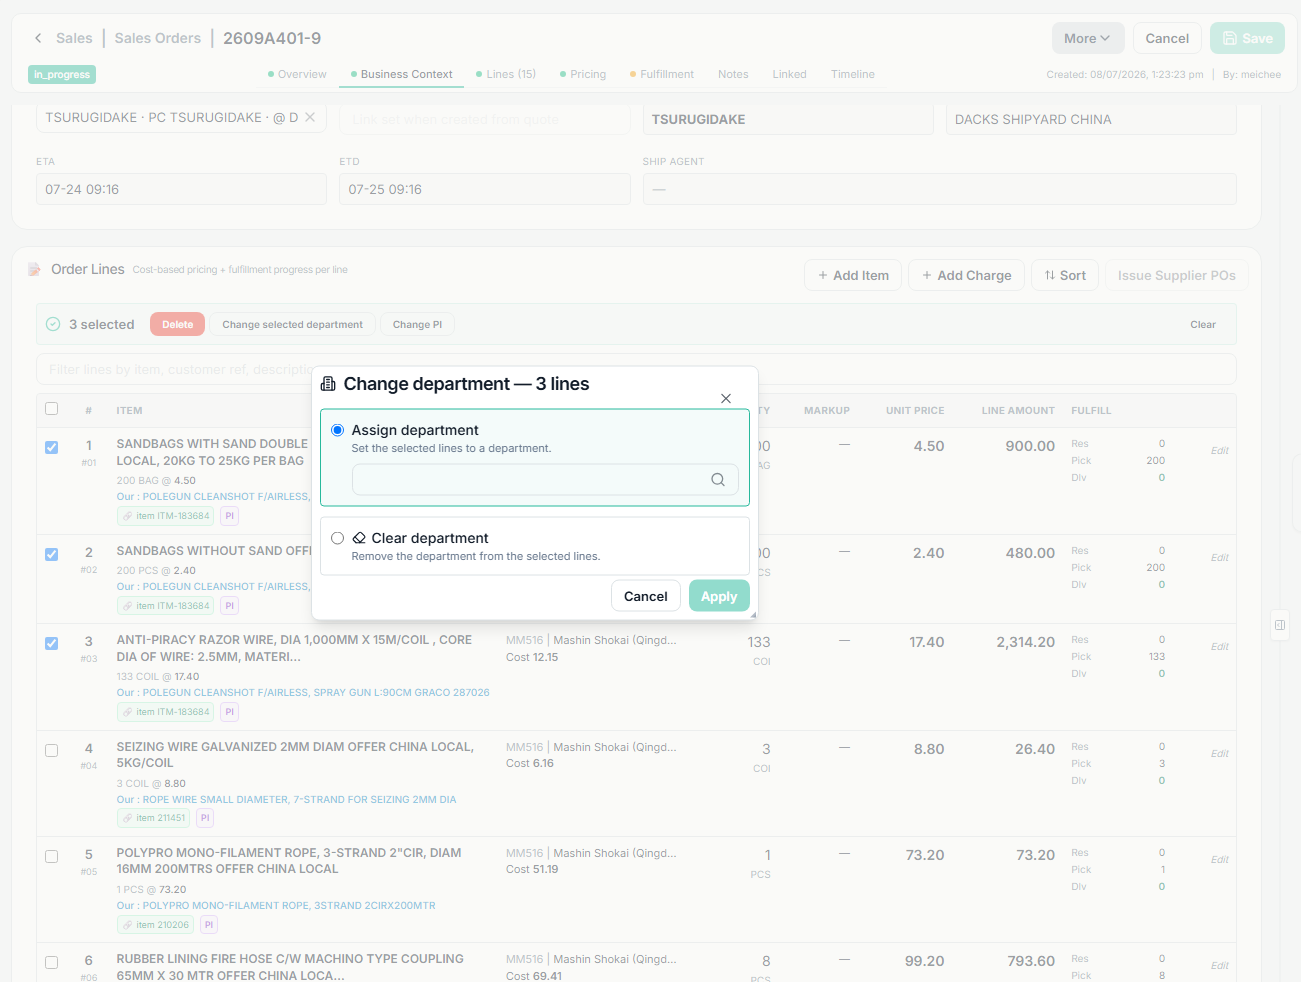
Sets — or clears — the department on the ticked lines in one step, so you don't have to open each line to re-tag it. The dialog offers two choices:
- Assign department. Pick a department and every selected line is set to it.
- Clear department. Removes the department from the selected lines.
Change PI
The PI flag controls whether a line prints on the Sales Order Proforma Invoice. A line tagged PI is included; a line without the tag is left off. Use this bulk editor to switch several lines at once instead of toggling each line's own PI setting.
- Include on Proforma Invoice. The selected lines will print on the SO Proforma Invoice (they show the PI tag).
- Exclude from Proforma Invoice. The selected lines are left off the SO Proforma Invoice.
What you can do
- Advance the order. It moves draft → submitted → confirmed → fulfilled → completed. Confirm Order also sends the customer a WhatsApp confirmation.
- Care-off in one switch. The master Care-Off toggle sets every line as care-off and carries that down to the delivery, invoice, picking and packing.
- Frozen addresses. The bill-to and ship-to are saved onto the order, so printouts always use this copy, never a later change to the customer record.
- Reorder lines. Drag them or sort by line number; they're renumbered safely for you.
- Edit lines in bulk. Tick several lines and use Change selected department or Change PI to re-tag them all at once — see Working with lines in bulk above.
- Create from a file. Upload a customer PO or quote, let it read the lines, review, and the order opens pre-filled — either merged against an existing quote or as a standalone order.
- Match items to the catalogue. The Verify button checks the lines against the catalogue by IMPA; clear matches bind automatically, and you confirm the rest.
- Generate the next documents. Kick off the Supplier POs and the Delivery Order straight from the form.
How to use
- Usually created from an accepted quote in the Workbench — or click New or Create from File on the list.
- Confirm the customer, currency and customer PO number (required), and check the line prices and margins.
- Click Confirm Order to move it along.
- Generate the Supplier POs (buying side) and a Delivery Order (delivery side) from here.
⬆ Where it comes from
- An accepted Sales Quote / RFQ in the Workbench — carrying every line's cost, markup and supplier, and marking the quote accepted.
- Or from an uploaded file, or a blank New order.
⬇ What happens next
- Supplier POs — one draft per awarded supplier.
- Picking → Packing → Delivery Order.
- AR Invoice, which bills against the delivered quantity.
- The reserved / picked / packed / delivered counters fill in from those documents.
What you can print
- Sales Order — the order itself.
- Sales Order with cover page — the same, with a summary cover sheet added in front.
- Profoma Invoice — using the order's own frozen bill-to, with the shipping marks shown.
The form's top-bar Print menu prints just this order; the older single-document reports stay available from a Print (Legacy) card in the right sidebar. To print several orders together, tick them on the list and use its Print menu — see Batch Printing.