Navigation & Lists
How you move around the app: the menu on the left, the list of records in the middle, and what happens when you click one. Every screen works the same way — this is the "find and open" half of the app (the "read and change" half is Standard Forms).
The menu (left sidebar)
The menu on the left groups every screen by area — Master Data, Sales, Purchase, Fulfillment, Finance, and so on. Click a group to open it, then click an item to open that screen's list. The most-used screens for day-to-day ship-chandler work are the ones in this guide.
What a list looks like
Every screen opens on a list — a table of the records you already have (customers, orders, invoices…). All lists share the same toolbar, so once you know one, you know them all.
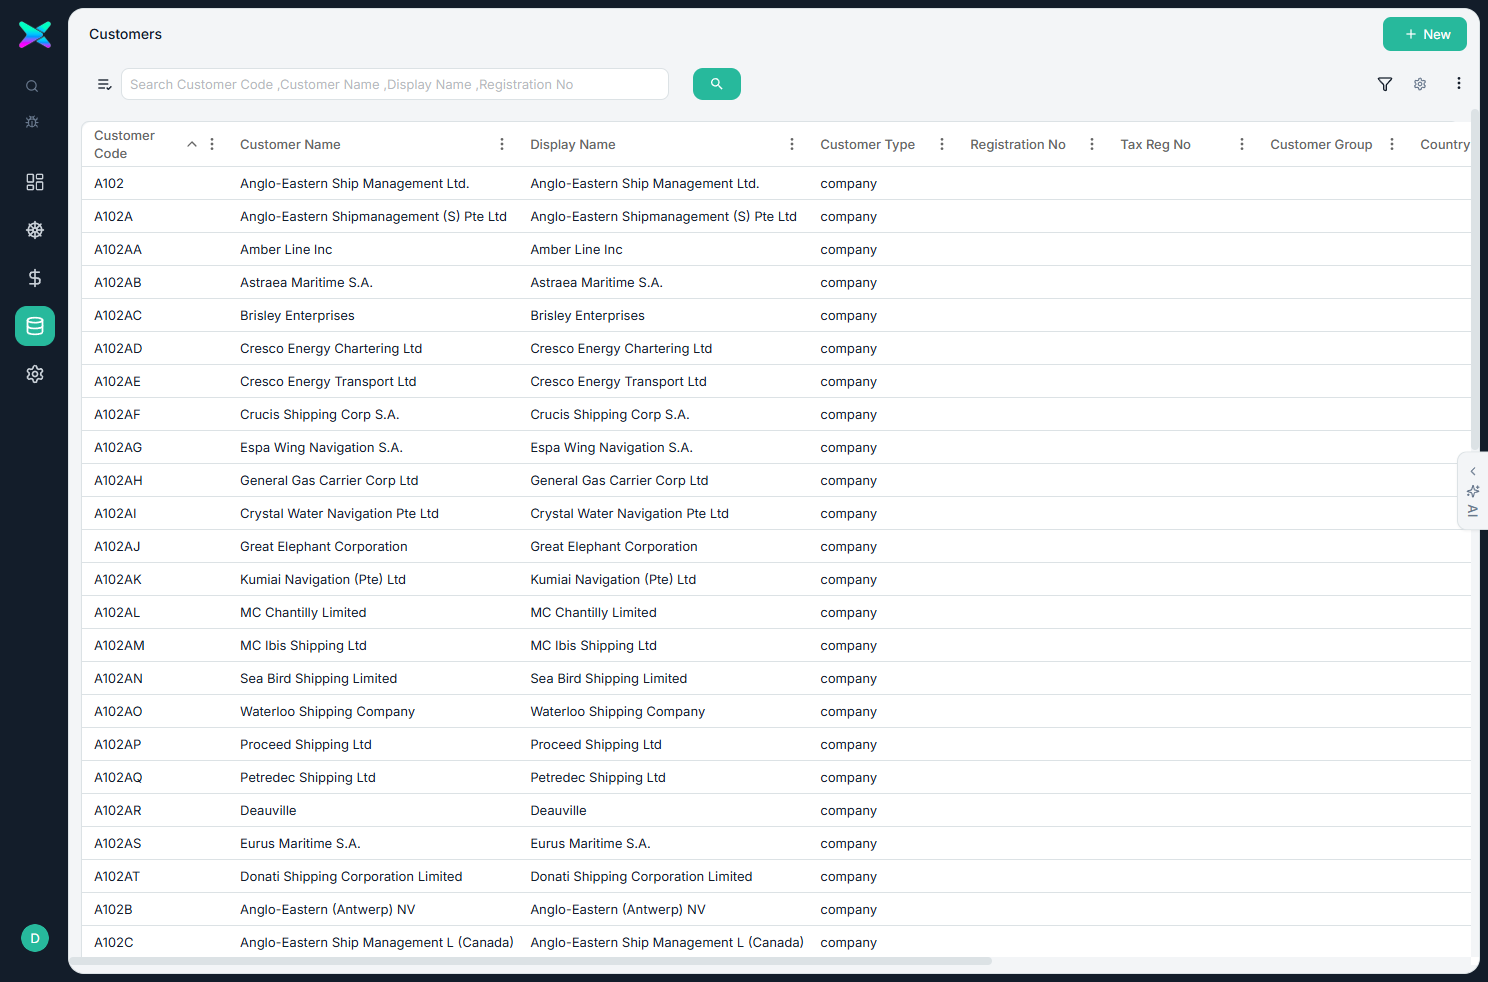
| On the toolbar | What it does |
|---|---|
| Search box | Type any part of a name, code or number to narrow the list. The placeholder text tells you which fields it searches. |
| Filter (funnel) | Build precise conditions — "status is confirmed", "date is this month", "total over 10,000". See Search · Filter · Sort. |
| Column headings | Click to sort ascending; click again for descending. |
| Column settings (gear) | Choose which columns to show. |
| Export | Download what you're looking at as Excel, CSV or a data file. |
| Tick boxes | On some lists (like Purchase Order) you can tick several rows to act on them together — for example, print them all at once. |
| + New | Start a new record. Some screens add a second button, such as Create from File, which reads a document and fills the form for you. |
Opening a record
Click any row to open it. Most screens open the record's form in read-only view, so you can look without changing anything (then press Edit when you want to make changes).
Your lists are always up to date
Lists show live data. When you (or a colleague) save a change, open lists refresh on their own — you don't need to reload the page to see the latest.